

1. Create a Smart Contract
This is the first chapter of the tutorial on building an end-to-end dapp on Aptos. If you haven’t done it, review that introduction, and ensure your environment meets the prerequisites listed there.
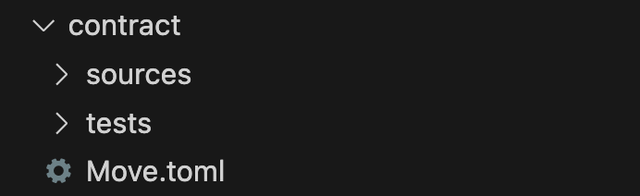
Now that you are all set up, let’s explore the contract directory.
What is a Move.toml file?
Section titled “What is a Move.toml file?”A Move.toml file is a manifest file that contains metadata such as name, version, and dependencies for the package.
Take a look at the new Move.toml file. You should see your package information and an AptosFramework dependency. The AptosFramework dependency points to the aptos-core/aptos-move/framework/aptos-framework GitHub repo main branch.
Why sources directory?
Section titled “Why sources directory?”The sources directory holds a collection of .move modules files. And later when we want to compile the package using the CLI, the compiler will look for that sources directory and its Move.toml file.
What is the tests directory?
Section titled “What is the tests directory?”The tests directory holds .move files that are used to test the files in our sources directory.
Create a Move module
Section titled “Create a Move module”An account is needed to publish a Move module. When we installed the template, the tool created a new account for us and added it to the .env file.
If you open that file, you will see content resembling:
PROJECT_NAME=my-aptos-dappVITE_APP_NETWORK=devnetVITE_APTOS_API_KEY=""VITE_MODULE_PUBLISHER_ACCOUNT_ADDRESS=0x1cecfef9e239eff12fb1a3d189a121c37f48908d86c0e9c02ec103e0a05ddebb#This is the module publisher account's private key. Be cautious about who you share it with, and ensure it is not exposed when deploying your dApp.VITE_MODULE_PUBLISHER_ACCOUNT_PRIVATE_KEY=0x84638fd5c42d0937503111a587307169842f355ab661b5253c01cfe389373f43The Boilerplate template comes with a pre generated message_board.move file, a relevant test file and a Move.toml file.
As mentioned, our sources directory holds our .move module files; so let’s create a new todolist.move file.
- Create a new
todolist.movefile within thesourcesdirectory and add the following to that file:
module todolist_addr::todolist {
}- Open the
Move.tomlfile. - Add the following code to that Move file:
[addresses]todolist_addr='_'What is the '_' in the Move.toml file?
Section titled “What is the '_' in the Move.toml file?”The '_' is a placeholder for the account address. When we run the move compiler, the compiler will replace it with the actual account address.
create-aptos-dapp comes with premade scripts to easily run move commands, like compile, test and publish.
- Open each of the files in the
scripts/movedirectory and update themessage_board_addrvariable to betodolist_addr.
... namedAddresses: { todolist_addr: process.env.VITE_MODULE_PUBLISHER_ACCOUNT_ADDRESS, },...Our contract logic
Section titled “Our contract logic”Before jumping into writing code, let’s first understand what we want our smart contract program to do. For ease of understanding, we will keep the logic pretty simple:
- An account creates a new list.
- An account creates a new task on their list.
- Whenever someone creates a new task, emit a
task_createdevent.
- Whenever someone creates a new task, emit a
- Let an account mark their task as completed.
We can start with defining a TodoList struct, that holds the:
- tasks array
- new task event
- a task counter that counts the number of created tasks (we can use that to differentiate between the tasks)
And also create a Task struct that holds:
- the task ID - derived from the TodoList task counter.
- address - the account address who created that task.
- content - the task content.
- completed - a boolean that marks whether that task is completed or not.
On the todolist.move file, update the content in the module with:
...struct TodoList has key {    tasks: Table<u64, Task>,    set_task_event: event::EventHandle<Task>,    task_counter: u64  }
struct Task has store, drop, copy {    task_id: u64,    address:address,    content: String,    completed: bool,  }...
What did we just add?
TodoList
A struct that has the key and store abilities:
Keyability allows struct to be used as a storage identifier. In other words,keyis an ability to be stored at the top-level and act as a storage. We need it here to haveTodoListbe a resource stored in our user account.
When a struct has the key ability, it turns this struct into a resource:
Resourceis stored under the account - therefore it exists only when assigned to an account and can be accessed through this account only.
Task
A struct that has the store, drop and copyabilities.
• Store - Task needs Store as it’s stored inside another struct (TodoList)
• Copy - value can be copied (or cloned by value).
• Drop - value can be dropped by the end of scope.
Let’s try to compile what we have now:
- Run:
npm run move:compile
Seeing errors?! Let’s understand them.
We have some errors on Unbound type- this is happening because we used some types but never imported them, and the compiler doesn’t know where to get them from.
- On the top of the module, import those types by adding:
...use aptos_framework::event;use std::string::String;use aptos_std::table::Table;...That will tell the compiler where it can get those types from.
- Run the
npm run move:compilecommand again; If all goes well, we should see a response resembling (where the resulting account address is your default profile account address):
Compiling, may take a little while to download git dependencies...UPDATING GIT DEPENDENCY https://github.com/aptos-labs/aptos-core.gitINCLUDING DEPENDENCY AptosFrameworkINCLUDING DEPENDENCY AptosStdlibINCLUDING DEPENDENCY MoveStdlibBUILDING MessageBoard{"Result": [ "1cecfef9e239eff12fb1a3d189a121c37f48908d86c0e9c02ec103e0a05ddebb::message_board", "1cecfef9e239eff12fb1a3d189a121c37f48908d86c0e9c02ec103e0a05ddebb::todolist" ]}At this point, we have successfully compiled our Move module. Yay!
We can also delete the message_board.move file, as we won’t be using it. And remove the message_board_addr from the Move.toml file.
- Let’s make sure everything is still working by running the
npm run move:compilecommand again.
We also have a new move/build directory (created by the compiler) that holds our compiled modules, build information and sources directory.
Create list function
Section titled “Create list function”The first thing an account can and should do with our contract is to create a new list.
Creating a list is essentially submitting a transaction, and so we need to know the signer who signed and submitted the transaction:
- Add a
create_listfunction that accepts asigner
public entry fun create_list(account: &signer){
}
Let’s understand the components of this function
-
entry- an entry function is a function that can be called via transactions. Simply put, whenever you want to submit a transaction to the chain, you should call an entry function. -
&signer- The signer argument is injected by the Move VM as the address who signed that transaction.
Our code has a TodoList resource. Resource is stored under the account; therefore, it exists only when assigned to an account and can be accessed only through this account.
That means to create the TodoList resource, we need to assign it to an account that only this account can have access to.
The create_list function can handle that TodoList resource creation.
- Add the following to the
create_listfunction
public entry fun create_list(account: &signer){ let tasks_holder = TodoList { tasks: table::new(), set_task_event: account::new_event_handle<Task>(account), task_counter: 0 }; // move the TodoList resource under the signer account move_to(account, tasks_holder);}This function takes in a signer, creates a new TodoList resource, and uses move_to to have the resource stored in the provided signer account.
Create task function
Section titled “Create task function”As mentioned before, our contract has a create task function that lets an account create a new task. Creating a task is also essentially submitting a transaction, and so we need to know the signer who signed and submitted the transaction. Another element we want to accept in our function is the task content.
- Add a
create_taskfunction that accepts asignerand taskcontentand the function logic.
public entry fun create_task(account: &signer, content: String) acquires TodoList { // gets the signer address let signer_address = signer::address_of(account); // gets the TodoList resource let todo_list = borrow_global_mut<TodoList>(signer_address); // increment task counter let counter = todo_list.task_counter + 1; // creates a new Task let new_task = Task { task_id: counter, address: signer_address, content, completed: false }; // adds the new task into the tasks table table::upsert(&mut todo_list.tasks, counter, new_task); // sets the task counter to be the incremented counter todo_list.task_counter = counter; // fires a new task created event event::emit_event<Task>( &mut borrow_global_mut<TodoList>(signer_address).set_task_event, new_task, ); }- Since we now use two new modules - signer and table (you can see it being used in
signer::andtable::) - we need to import these modules. At the top of the file, add those two use statements:
use std::signer;use aptos_std::table::{Self, Table}; // This one we already have, need to modify itBack to the code; what is happening here?
- First, we want to get the signer address, so we can get this account’s
TodoListresource. - Then, we retrieve the
TodoListresource with thesigner_address; with that we have access to theTodoListproperties. - We can now increment the
task_counterproperty, and create a newTaskwith thesigner_address,counterand the providedcontent. - We push it to the
todo_list.taskstable that holds all of our tasks along with the newcounter(which is the table key) and the newly created Task. - Then we assign the global
task_counterto be the new incremented counter. - Finally, we emit the
task_createdevent that holds the new Task data.emit_eventis anaptos-frameworkfunction that accepts a reference to the event handle and a message. In our case, we are passing the function a reference (using the sign &) to the account’sTodoListresourceset_task_eventproperty as the first argument and a second message argument which is the new Task we just created. Remember, we have aset_task_eventproperty in ourTodoListstruct.
Complete task function
Section titled “Complete task function”Another function we want our contract to hold is the option to mark a task as completed.
- Add a
complete_taskfunction that accepts asignerand atask_id:
public entry fun complete_task(account: &signer, task_id: u64) acquires TodoList { // gets the signer address let signer_address = signer::address_of(account); // gets the TodoList resource let todo_list = borrow_global_mut<TodoList>(signer_address); // gets the task matches the task_id let task_record = table::borrow_mut(&mut todo_list.tasks, task_id); // update task as completed task_record.completed = true;}Let’s understand the code.
- As before in our create list function, we retrieve the
TodoListstruct by the signer address, so we can have access to the tasks table that holds all the account tasks. - Then, we look for the task with the provided
task_idon thetodo_list.taskstable. - Finally, we update that task completed property to be true.
Now try to compile the code:
- Run:
npm run move:compile - Another
Unbounderror? To fix this, add ausestatement to use theaccountmodule.
use aptos_framework::account;- run
npm run move:compileagain.
Add validations
Section titled “Add validations”As this code now compiles, we want to have some validations and checks before creating a new task or updating the task as completed, so we can be sure our functions work as expected.
- Add a check to the
create_taskfunction to make sure the signer account has a list:
public entry fun create_task(account: &signer, content: String) acquires TodoList {  // gets the signer address  let signer_address = signer::address_of(account);
  // assert signer has created a list  assert!(exists<TodoList>(signer_address), 1);
...}- Add a check to the
complete_taskfunction to make sure the:- signer has created a list.
- task exists.
- task is not completed.
With:
public entry fun complete_task(account: &signer, task_id: u64) acquires TodoList { // gets the signer address let signer_address = signer::address_of(account); // assert signer has created a list assert!(exists<TodoList>(signer_address), 1); // gets the TodoList resource let todo_list = borrow_global_mut<TodoList>(signer_address); // assert task exists assert!(table::contains(&todo_list.tasks, task_id), 2); // gets the task matched the task_id let task_record = table::borrow_mut(&mut todo_list.tasks, task_id); // assert task is not completed assert!(task_record.completed == false, 3); // update task as completed task_record.completed = true;}We just added our first assert statements!
If you noticed, assert accepts two arguments: the first is what to check for, and the second is an error code. Instead of passing in an arbitrary number, a convention is to declare errors on the top of the module file and use these instead.
On the top of the module file (under the use statements), add those error declarations:
// Errorsconst ENOT_INITIALIZED: u64 = 1;const ETASK_DOESNT_EXIST: u64 = 2;const ETASK_IS_COMPLETED: u64 = 3;Now we can update our asserts with these constants:
public entry fun create_task(account: &signer, content: String) acquires TodoList {  // gets the signer address  let signer_address = signer::address_of(account);
  // assert signer has created a list  assert!(exists<TodoList>(signer_address), ENOT_INITIALIZED);
  ...}


public entry fun complete_task(account: &signer, task_id: u64) acquires TodoList {  // gets the signer address  let signer_address = signer::address_of(account);  assert!(exists<TodoList>(signer_address), ENOT_INITIALIZED);  // gets the TodoList resource  let todo_list = borrow_global_mut<TodoList>(signer_address);  // assert task exists  assert!(table::contains(&todo_list.tasks, task_id), ETASK_DOESNT_EXIST);  // gets the task matched the task_id  let task_record = table::borrow_mut(&mut todo_list.tasks, task_id);  // assert task is not completed  assert!(task_record.completed == false, ETASK_IS_COMPLETED);  // update task as completed  task_record.completed = true;}
WONDERFUL!!
Let’s stop for one moment and make sure our code compiles by running the npm run move:compile command. If all goes well, we should output resembling:
Compiling, may take a little while to download git dependencies...UPDATING GIT DEPENDENCY https://github.com/aptos-labs/aptos-core.gitINCLUDING DEPENDENCY AptosFrameworkINCLUDING DEPENDENCY AptosStdlibINCLUDING DEPENDENCY MoveStdlibBUILDING MessageBoard{ "Result": [ "1cecfef9e239eff12fb1a3d189a121c37f48908d86c0e9c02ec103e0a05ddebb::todolist" ]}If you encounter errors, make sure you followed the steps above correctly and try to determine the cause of the issues.
Write tests
Section titled “Write tests”Now that we have our smart contract logic ready, we need to add some tests for it.
First, delete the test_end_to_end.move file in the tests directory, as we won’t be using it.
- For simplicity, and because we don’t have much code to test, we use one function to test the whole flow of the app and will have it in the
todolist.movefile. The test steps are:
// create a list // create a task // update task as completed- Add the following code to the bottom of the
todolist.movefile:
#[test]public entry fun test_flow() {
}
Note: Test functions use the #[test] annotation.
- Update the test function to be:
#[test(admin = @0x123)]public entry fun test_flow(admin: signer) acquires TodoList {  // creates an admin @todolist_addr account for test  account::create_account_for_test(signer::address_of(&admin));  // initialize contract with admin account  create_list(&admin);
  // creates a task by the admin account  create_task(&admin, string::utf8(b"New Task"));  let task_count = event::counter(&borrow_global<TodoList>(signer::address_of(&admin)).set_task_event);  assert!(task_count == 1, 4);  let todo_list = borrow_global<TodoList>(signer::address_of(&admin));  assert!(todo_list.task_counter == 1, 5);  let task_record = table::borrow(&todo_list.tasks, todo_list.task_counter);  assert!(task_record.task_id == 1, 6);  assert!(task_record.completed == false, 7);  assert!(task_record.content == string::utf8(b"New Task"), 8);  assert!(task_record.address == signer::address_of(&admin), 9);
  // updates task as completed  complete_task(&admin, 1);  let todo_list = borrow_global<TodoList>(signer::address_of(&admin));  let task_record = table::borrow(&todo_list.tasks, 1);  assert!(task_record.task_id == 1, 10);  assert!(task_record.completed == true, 11);  assert!(task_record.content == string::utf8(b"New Task"), 12);  assert!(task_record.address == signer::address_of(&admin), 13);}
Our #[test] annotation has changed and declares an account variable.
Additionally, the function itself now accepts a signer argument.
Let’s understand our tests.
Since our tests run outside an account scope, we need to create accounts to use in our tests. The #[test] annotation gives us the option to declare those accounts. We use an admin account and set it to a random account address (@0x123). The function accepts this signer (account) and creates it by using a built-in function to create an account for test.
Then we simply go through the flow by:
- creating a list
- creating a task
- updating a task as completed
And assert the expected data/behavior at each step.
Before running the tests again, we need to import (use) some new modules we are now employing in our code:
- At the top of the file, add this
usestatement:
use std::string::{Self, String}; // already have it, need to modify- Run the
npm run move:testcommand. If all goes right, we should see a success message like:
Running Move unit tests[ PASS ] 0x1cecfef9e239eff12fb1a3d189a121c37f48908d86c0e9c02ec103e0a05ddebb::todolist::test_flowTest result: OK. Total tests: 1; passed: 1; failed: 0{ "Result": "Success"}- Let’s add one more test to make sure our
complete_taskfunction works as expected. Add another test function with:
#[test(admin = @0x123)]#[expected_failure(abort_code = ENOT_INITIALIZED)]public entry fun account_can_not_update_task(admin: signer) acquires TodoList { // creates an admin @todolist_addr account for test account::create_account_for_test(signer::address_of(&admin)); // account can not toggle task as no list was created complete_task(&admin, 2);}This test confirms that an account can’t use that function if they haven’t created a list before.
The test also uses a special annotation #[expected_failure] that, as the name suggests, expects to fail with an ENOT_INITIALIZED error code.
- Run the
aptos move testcommand. If all goes right, we should see a success message like:
Running Move unit tests[ PASS ] 0x1cecfef9e239eff12fb1a3d189a121c37f48908d86c0e9c02ec103e0a05ddebb::todolist::account_can_not_update_task[ PASS ] 0x1cecfef9e239eff12fb1a3d189a121c37f48908d86c0e9c02ec103e0a05ddebb::todolist::test_flowTest result: OK. Total tests: 2; passed: 2; failed: 0{ "Result": "Success"}Now that everything works, we can compile the Move modules and publish the Move package to chain so our React app (and everyone else) can interact with our smart contract!
Publish todolist module to chain
Section titled “Publish todolist module to chain”- Run:
npm run move:compile
We are getting some Unused alias errors. This is because we added the string alias before since we use it in our tests. But we don’t use this alias in our smart contract code.
This is why we are getting this error when we want to compile the module but not are getting it when we only run tests.
To fix it, we can add a use statement that would be used only in tests.
Add the following use statement where we have all of our import statements.
use std::string::String; // change to this...#[test_only]use std::string; // add this- Run:
npm run move:testandnpm run move:compile- all should work without errors. - Run:
npm run move:publish - Enter
yesin the prompt.
Oh no! We got an error!
It complains about an account mismatch. Apparently we compiled the package with a different account we try to publish it.
Let’s fix it.
- Open the
scripts/move/publish.jsfile. - Update the
addressNamevariable value to betodolist_addr.
That will use the same account we used for compiling the package.
Let’s try again:
-
Run:
npm run move:publish -
Enter
yesin the prompt. -
Enter
yesin the second prompt. -
That will compile, simulate and finally publish your module into devnet. You should see a success message:
Transaction submitted: https://explorer.aptoslabs.com/txn/0x68dadf24b9ec29b9c32bd78836d20032de615bbef5f10db580228577f7ca945a?network=devnetCode was successfully deployed to object address 0x2bce4f7bb8a67641875ba5076850d2154eb9621b0c021982bdcd80731279efa6{ "Result": "Success"}- You can now head to the Aptos Explorer link and view the transaction details. You can also see the module published on chain by looking for the object address.
Now let’s set up the frontend in chapter 2.