

2. Set up the frontend
This is the second chapter of the tutorial on building an end-to-end dapp on Aptos where you have already created a smart contract and are now setting up the frontend.
Set up the frontend
Section titled “Set up the frontend”create-aptos-dapp has already created the frontend for us with a basic layout and Wallet implementation using the aptos-wallet-adapter library.
-
Run:
npm run devAt this point you should have your app running on http://localhost:5173, which displays the default template layout.
-
In the
frontenddirectory, find all the frontend files. Let’s clean it up a bit. -
Open the
App.tsxfile and update its content to be:
import { Header } from "@/components/Header";import { TopBanner } from "@/components/TopBanner";
function App() {  return (    <>      <TopBanner />      <Header />      <div className="flex items-center justify-center flex-col">        <div>My app goes here</div>      </div>    </>  );}
export default App;
Once you save the changes, you should see that the app content has changed in the browser and displays My app goes here.
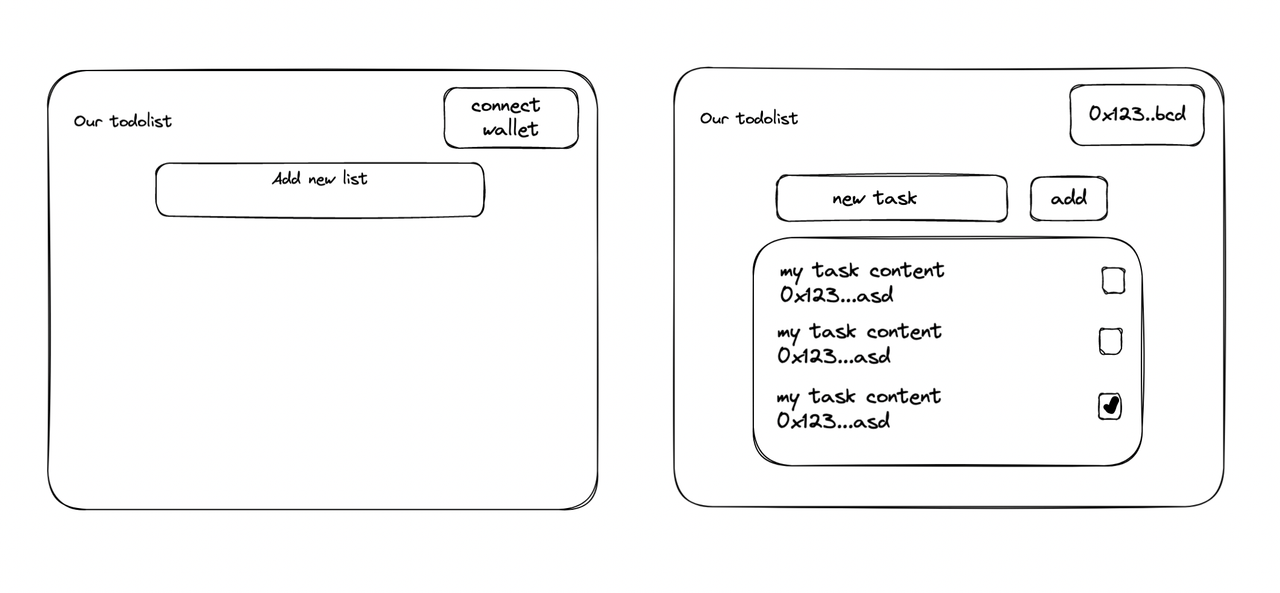
Our dapp UI
Section titled “Our dapp UI”First we will build the dapp UI layout. We have two UI states for the app:
- When an account hasn’t created a list yet (on the left).
- When an account has created a list and can now add tasks to it (on the right).
We now have a working client with a Wallet connect button and a wallet selector modal. Feel free to play with it and connect a wallet with it.
Then learn how to fetch data from chain in chapter 3.